I swear I’m not trying to be a Clip Studio Paint blog. But I find myself not having much else to write about on this blog these days. And I do find Clip Studio Paint updates and reading their release notes genuinely exciting.
We now have Clip Studio Paint 1.9.2 today. (see the official Release Notes page)
Just based on their announcements, I was originally not too excited about it. But it turns out they hid some unexpectedly nice things in the this latest update.
Here’s a rundown of what’s new; the features that stand out to me, and some attempt to clarify details that might be a bit confusing.
Before anything else, if you jumped on version 1.9.1 when it came out, they immediately found a problem opening files, and released a hotfixed version, 1.9.2. Make sure you check their site again and download the latest release.
“Smart Smoothing”
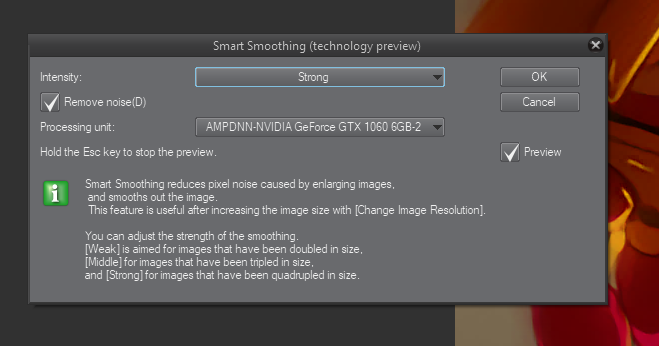
To me— despite its limited actual use in the day-to-day of an artist in production— this is the star of this update. The good folks at CELSYS continue to dabble with deep learning, and has given us Neural Network based Smoothing in the Clip Studio Paint UI!
This gives us a total of four “Technology Preview” AI features. The other three being Colorize, Remove Tones from version 1.8.4, and Pose Scanner from 1.8.6.
As with their other AI-backed features, they’ve chosen to designate this feature as “Preview Feature”. The implication is that they have plans to improve it and/or we shouldn’t have high expectations in its current form.
Waifu2x is a similar, well-known open-source AI upscaling/denoising project so I was curious to see if they were using that, or if this is some competing implementation.
Here’s a comparison:
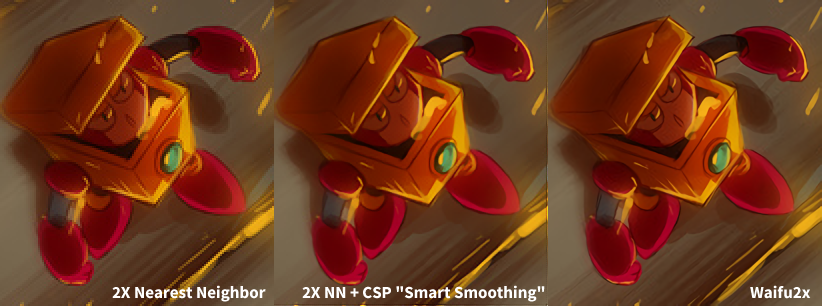
Conclusion 1: It doesn’t seem to be the Waifu2x project integrated into CSP. Or if it is, it didn’t use the same dataset.
Conclusion 2: Waifu2x does a better job at preserving details. But you need to upload your thing to the thing, or look for risk downloading a third party thing.
EDIT: They actually had a press release about their partnership with AXELL Inc., a Japanese AI software and consulting company, whose SDK (named “ailia”) underlies this feature. They seem to be involved in the other AI/server-side features. I say good job on the features and the collaborative efforts so far!
EDIT2: Updated section to correct version numbers and mention Pose Scanner which I forgot.
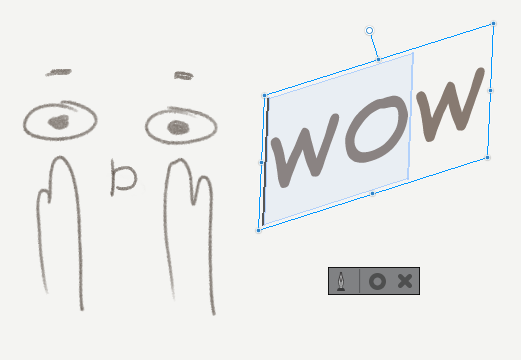
Text Layer Transformability
I didn’t think I needed this until that one time last week I tried to rotate an entire canvas. I realized it would force me to convert the text layers into raster layers. Otherwise, I wouldn’t have noticed.
I imagine this was a lot of hard work for the engineers. I consider this more of them catching up to expectations. Until now, you haven’t been able to rotate or scale editable text layers. Much less skew or warp them. (No, you can’t warp text yet. Maybe someday.)
But a very welcome feature. You can now rotate, scale, flip and skew text layers. And I am very grateful.
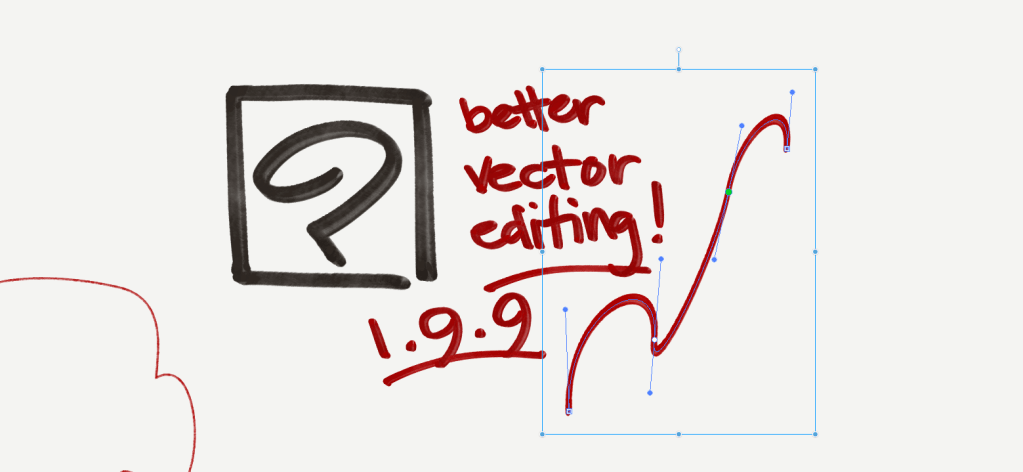
Improved Transform Tool
This is also a welcome step towards feature parity with the “Adobe standard”. Originally, the Transform tool only allowed you to Scale/Rotate, or to Free Transform (individually drag the corners of the transformation box).
The new transform modes Perspective and Skew, lets you control opposing corners of a transformation when you adjust them. Sometimes this is more useful for making sure the resulting shape makes sense than doing it the completely manual Free Transform way.
Note that you can actually modify the behavior of Free Transform handles by holding down the CTRL, SHIFT or ALT keys in various combinations while dragging the side or corner hands. This is a bit obscure, difficult on an ExpressKey setup, and just sorta unavailable for iPad users, which is probably another reason why they added these new modes.
Making it more similar to other programs, the Transform operation can now be done on Text layers. (but you can’t free-transform text yet)
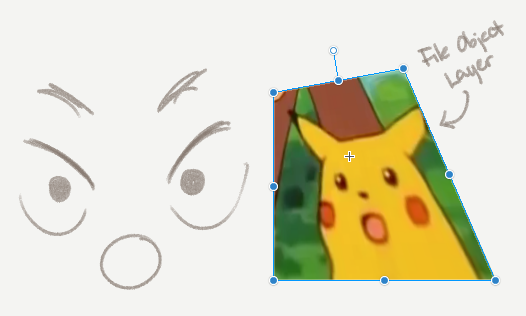
They’ve also managed to get it to work on Image layers and File Object layers too.
Note that you could already do free transforms on File objects and Image layers before but you needed to switch to the Operation tool.
Other small but game-changing things
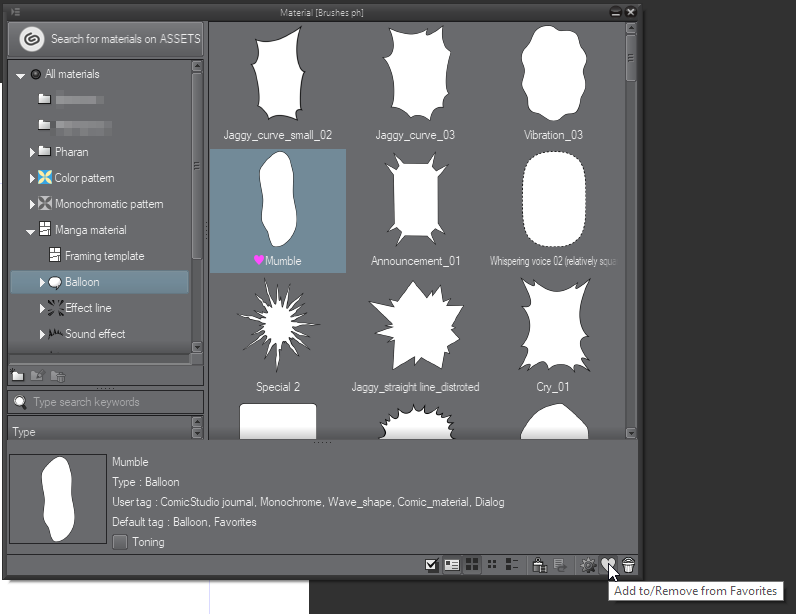
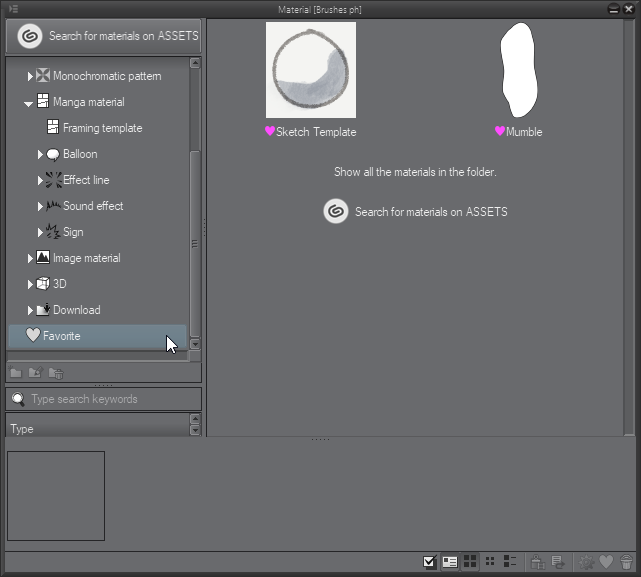
[Materials] Material Favorites
The Materials panel now has a favorites system. You can tag your most important materials and it groups it into a “Favorites” tag. (Also adds a little pink heart next to the name)
[Layers] Ungroup Layer Folder
You can now ungroup a folder in the layers list. The new default keyboard shortcut for this is CTRL+SHIFT+G (cmd+shift+g on the mac).
Some updates to English menu item phrasings
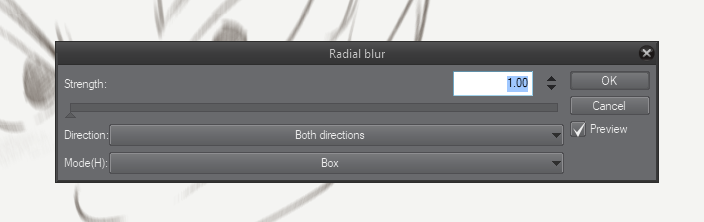
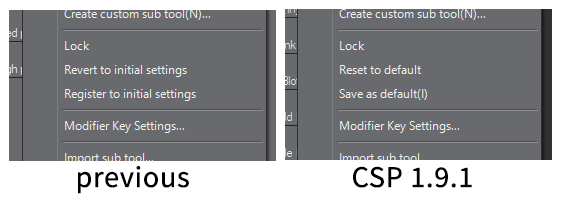
Sprinkled around the program seem to be improvements in the English translation/localization of the menu items.
For example, instead of [Area to blur], it now says [Strength]. For radial blur, instead of [Forward], it says [Outward]. Generally, they’re shorter, and make more intuitive sense. I like it.
A few were mentioned in the release notes, I also found ones that weren’t documented at all. There were probably too many to list so they opted to only mention what they thought would cause the most confusion.
This is probably stuff you won’t notice unless you use it all the time, or you check an older tutorial and they used the older phrasing.
But these little improvements add up to a program you feel like you can trust, I think. And I’m glad the developers are playing attention to these details.
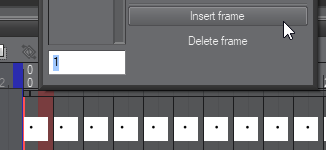
[Animation] Add/Remove Frames
Finally. They added [Insert Frame] and [Delete Frame] in the Timeline context menu and top menu. This is huge. It doesn’t exactly do what I wanted out of the box, but it’s handy, and workable into what I wanted.
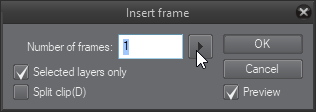
With a little Auto-Action magic; I just recorded two actions, adding and removing one frame, and bound keyboard shortcuts to them.
This is invaluable for pencil testing and adjusting animations. I may do a separate, uncomplicated post just on how to set this up. I think it’s that useful.
EDIT: I’ve written the post I promised above. Check it out here!


Leave a comment